As it is our intention to use Sundance through out the year, it is necessary to enjoy a little comfort in the form of heating. The original heating had reached the end of its life and the heating unit had been removed. However, the original heating was air ducted which is a common way to provide heating on a small vessel. Air heating is light weight and the ducting can be easily installed. The thing with air heating is that it is noisy and is not good for the eyes as the air is very dry.
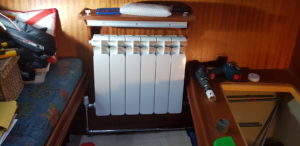
Dinette Radiator
The solution for us is to install a wet central heating installation. As there is the room to fit wet radiators in the stern cabin, the saloon, the dinette, the forward cabin and in the heads.
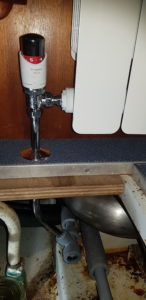
Thermostatic Radiator Valve
The Eberspacher diesel heater is controlled by an electronic time clock controller and drawers diesel from the main diesel tanks and is connected to the 12 volt boat supply.
As I did not have the space for a expansion header tank which came with the heating kit, so I opted to install the heating as an unvented installation with an expansion vessel installed under the stern cabin bunk.
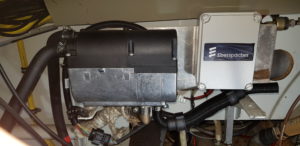
Eberspacher heater
The biggest problem was finding piping runs through Sundance which would not give rise to air locks when filling and operating the system. I also opted for an automatic air vent in the pipe work which supplied
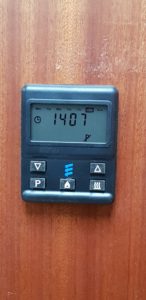
Timer Controller
the hot water cylinder.
The heating pipework was mainly plastic with plastic connections which was obtained from the local plumbing supplier together with the radiators, TVR’s, expansion vessel, safety pressure valve and various lever valves. Where the pipework was exposed I used chrome pipes with chromed compression joints as I thought that chrome would look better. I also used a number of chrome cover plates where the pipes passed through the floor and through timber panels.
The biggest problem was finding piping runs through Sundance which would not give rise to air locks when filling and operating the system. I also opted for an automatic air vent in the pipe work which supplied the hot water cylinder.
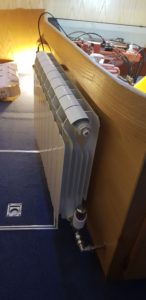
Stern Cabin Radiator
The standard fuel filters for the heaters are plastic, however I have an issue with using a plastic filter as in the event of a fire, the filter will melt and add fuel to the fire so to speak. I therefore decided to fit a metal filter instead.
As there had been a previous heater and the exhaust was in good condition, I decided to use the existing exhaust pipe which worked very well.
The time clock controller was installed in the saloon and the cabin heat is controlled by thermostatic radiator valves fitted to each of the radiators.
The installation of a wet heating installation also gave me the opportunity to give consideration to heating the domestic hot water from the new heating installation.
The problem I had was that the existing hot water cylinder only had a single heat exchanger which was connected to the engine coolent system. So the domestic water was heated from the engine while underway.
The installation of the new hot water cylinder is the subject of my next blog… 🙂
Please help to fund this blog by shopping at Amazon using the link from the Amazon icon below. This does not cost you anything extra, just access Amazon and log into your account as usual, make your purchases and Amazon pay me a tiny introduction fee.
I was unable to find the wet heating kit that I acquired from a specialist marine supplier on Amazon but I did find the air heating kit that I would have installed if I had gone down the air heating route that most small vessels are installed with.
Click on image below to view on Amazon. (air heating kit)
Thank your support


